RESOURCES
Printing Made Simple
Print Perfection with Our Easy-to-Use Online Resources
Bleed
If your artwork needs to be printed to the very edge of the finished size document, any images, colour etc. need to "bleed" off the edge of the paper by at least 3mm - this bleed will be printed but then cut off in the final cropping process.
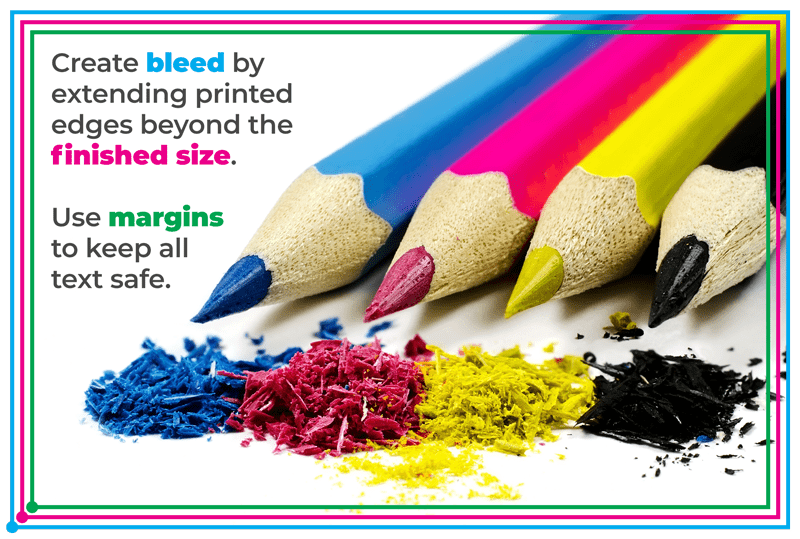
BLEED AREA
3mm area outside the finished paper size. The image should project into this. This will be trimmed off.
TRIM AREA / FINISHED SIZE
This is the final edge of the leaflet or flyer after the bleed area has been trimmed.
TEXT MARGIN / SAFE ZONE
Keep your text at least 5mm inside the trim edge to ensure that it is not trimmed off with the bleed area.
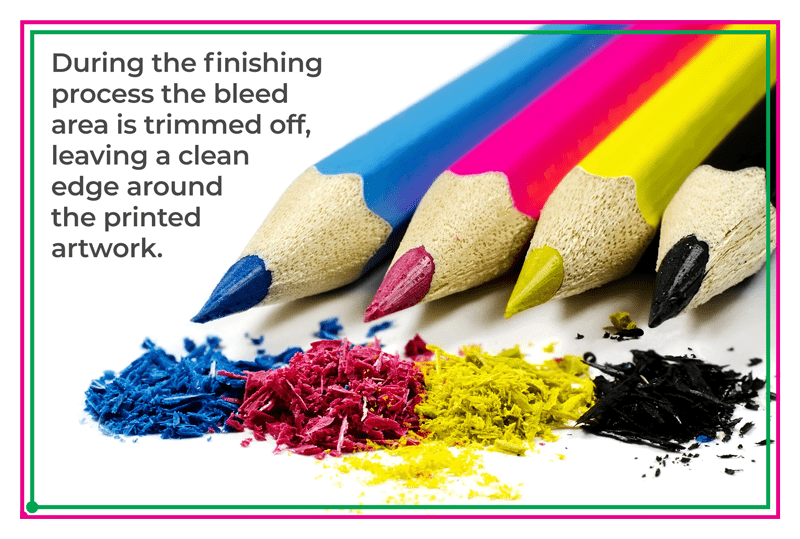
THE FINISHED SIZE
The bleed area has been trimmed off only leaving the pages edge and text margin.
THE FINISHED TEXT MARGIN
Your text is at least 5mm inside the trimmed edge of the print in a safe zone.
Design with Standard Paper Sizes
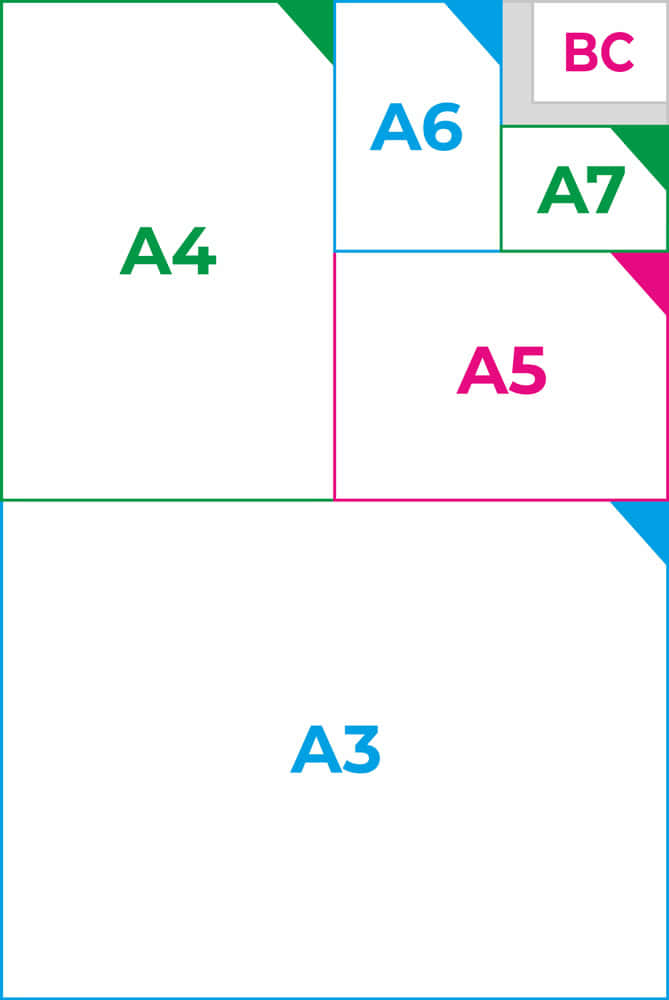
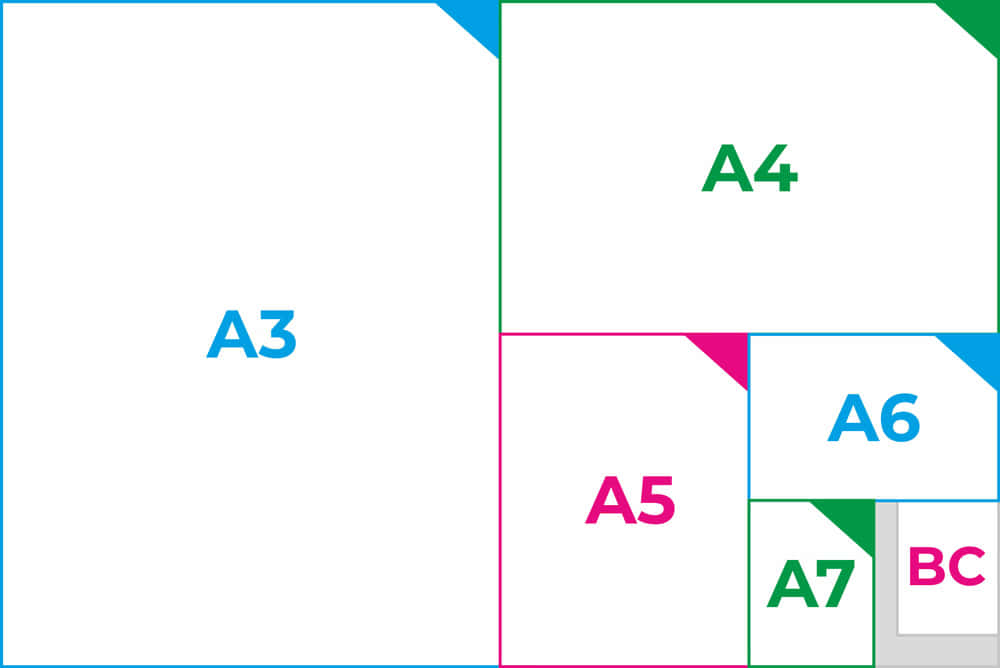
Whether you're crafting a standout business card or a bold poster, choosing the right paper size is the first step to capturing your audience's attention. Our size guide visualises the most common paper sizes, ensuring your design not only fits perfectly but also communicates effectively.
| Paper Size | Dimensions | With Bleed |
|---|---|---|
| A2 | 420mm x 594mm | 426mm x 600mm |
| A3 | 297mm x 420mm | 303mm x 426mm |
| A4 | 210mm x 297mm | 216mm x 303mm |
| A5 | 210mm x 148mm | 216mm x 154mm |
| A6 | 148mm x 105mm | 154mm x 111mm |
| A7 | 105mm x 74mm | 111mm x 80mm |
| Business Card | 85mm x 55mm | 91mm x 61mm |
CHOOSE YOUR CANVAS
A2 to A7 - Our guide spans from spacious A2 sheets to compact A7 leaflets, providing the dimensions you need to create with confidence.
Business Cards - Make a lasting impression with our precise business card measurements.
INCORPORATE BLEED
Bleed is essential for any artwork that extends to the very edge of the paper. It prevents unwanted white margins and ensures a professional finish. The 'With Bleed' measurements in our guide include the extra space needed to achieve this seamless look. Remember to extend your design into the bleed area to account for any slight shifts during the cutting process.
CUSTOM PAPER SIZES
Go beyond standard with custom paper sizes. Provide your dimensions and we'll craft your perfect print.
Resolution
Print files supplied with the incorrect resolution will give poor quality prints. We can check your artwork free of charge before printing and ensure your file is correct. Call us today for advice on 01792 414040
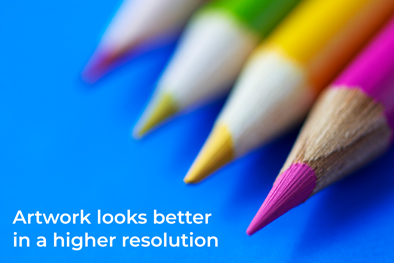
CORRECT RESOLUTION
A resolution of 300dpi or higher.
All non-vector artwork should be supplied at a minimum of 300 dpi.
For images smaller than actual size, increase dpi proportionately. e.g. 50% of actual size = 600dpi.

INCORRECT RESOLUTION
A resolution of 72dpi or lower.
Please do not decrease resolution of images any lower than 100dpi.
CMYK Colour for Print
Navigate the nuances of colour in print with our comprehensive guide. From the vibrant spectrum of CMYK to the precision of Pantone matching, we ensure your artwork translates flawlessly from screen to print.
COLOUR
All artwork for printing should be supplied in CMYK only.
Any RGB artwork that is supplied will be converted to CMYK and this may affect the appearance of your chosen colours.
Pantone colours made up of CMYK should be checked on a correct Pantone colour chart before print.
We cannot take responsibility for any unexpected results experienced from artwork that has been supplied in non-CMYK colours
COLOUR PROOFING
Digital proofs will not be 100% colour accurate to the final Litho print, they should be used as a guide only.
If you require a more accurate proof, these can be produced in more than one format.

PANTONE COLOUR
Selecting the right Pantone colours for your project is crucial, as they vary on coated versus uncoated paper stocks. To maintain the integrity of your chosen hues, always cross-reference with a Pantone colour chart for CMYK conversion.
Please contact us if you are using any other colour matching system other than Pantone.
OVERPRINTS & KNOCKOUT
Please ensure that no elements of the design are set to overprint unless specifically required. We cannot always check for this and it is likely to generate unexpected results.
TRANSPARENCIES
If you are using the transparency functions in Illustrator or CorelDraw for generated files, transparencies must be flattened and the files then converted to PDF.
Artwork Submission
Please use our secure online uploader for submitting your artwork. If your file is under 20Mb, you may opt to email it directly. For larger files, we recommend a service like Dropbox for a seamless transfer.
Copyright Compliance
You are responsible for ensuring that you hold the rights to all elements of your submitted artwork, including images, text and logos. By approving the job, you accept that copyright responsibility remains with you.
Proof Approval
Your go-ahead on a digital proof is essential before we print. Once you've signed off the proof, changes cannot be made unless a new proof is issued and approved.
Confirmation & Payment
We'll proceed with your job once we receive your confirmation, be it written or via email, alongside payment or a valid Purchase Order for those with established credit terms.
FILE FORMATS
Your artwork deserves to be seen exactly as you've designed it. That's why we champion PDFs for their unparalleled ability to deliver your vision from digital to print without a hitch. Whether you're a wizard with Adobe Creative Suite or a maestro on Canva, our guide ensures your files translate to print with precision and ease.
PDF FILES
PDFs reign supreme in preserving the fidelity of your design, making them our favoured format for print artwork. Secure every colour, line and font with the assurance that what you envision is what gets printed.
CREATIVE SUITE FILES
For artwork originating from Adobe’s Creative Suite:
Illustrator- Save as a PDF, with all text outlined to maintain the integrity of your fonts.
InDesign - Package your files with fonts outlined and all images embedded, then export as a PDF for complete print readiness.
Photoshop - Flatten all layers and rasterise text before saving as a PDF to ensure the image quality is sharp and text is crystal clear.
CORELDRAW FILES
We accept CorelDraw files up to version 2020. Just ensure you convert all text to curves before saving as a PDF.
CANVA DESIGNS
For designs crafted in Canva, bear in mind that gradients can be particularly sensitive to colour shifts when moving from RGB to CMYK for printing. To minimise surprises, use Canva Pro to export your designs as CMYK PDFs, safeguarding the vibrancy and smoothness of your gradients in the final print.
MICROSOFT DOCUMENTS
Publisher - Reach out for assistance in optimising Publisher files for print.
Word - Ideal for text submissions when we’re crafting your layout, though not suitable for direct printing.
